Forced Brake Upgrade: From Daily Driver to Track-Ready
During my last event, I noticed from the data, that the braking was lower than I would have expected. The Monday after the event, I experienced that dreaded moment when the car just didn’t stop as quickly as it should have. I had trouble stopping at the gate to wait for it to open, and I immediately knew something was wrong. Diagnosis? Bad brake rotors. A somewhat forced upgrade, but sometimes that’s the push you need to make improvements.

Why Upgrade?
Stock brakes are usually sufficient for typical autocross events. The runs are short, and the speeds aren’t too high, so brake fade or overheating rarely becomes an issue. But, since I needed to replace the rotors anyway, I thought it was the perfect opportunity to upgrade the system with something that would also perform well on occasional track days. I’ve been eyeing one of the upcoming Track Nights in America at Daytona Speedway, and I want to be ready when the time comes. Unless your car was designed with the track in mind, which I can assure you the Challenger SXT wasn’t, when you run stock brakes on a track day and push a little bit, after two laps you’re going to wish you had made this upgrade.
Here’s what I’m doing: new rotors, new pads, and a complete brake fluid flush—because it hasn’t been replaced in five years (and that’s way too long). Let me break it down.
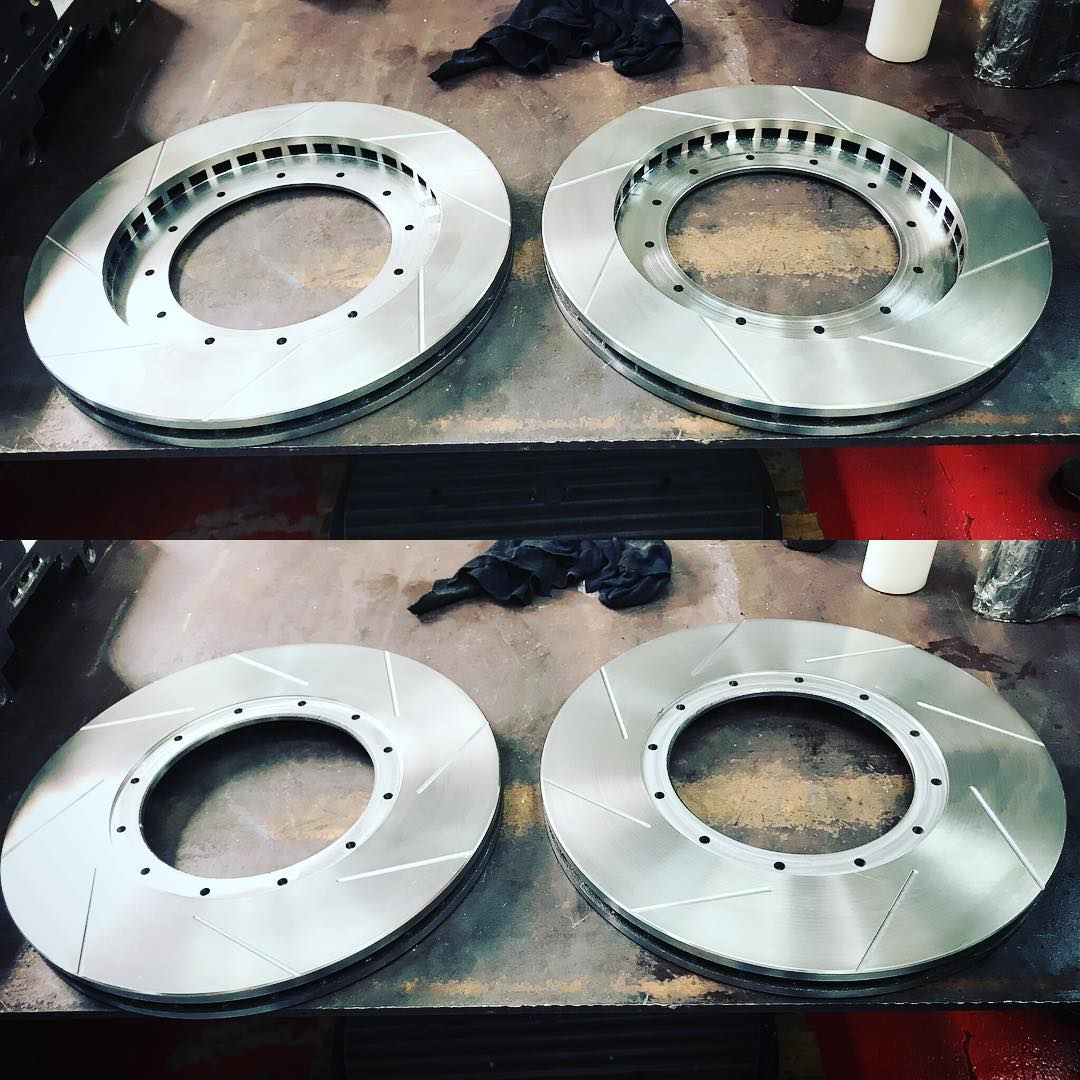
Rotors: Slotted, Not Through Drilled
I have a lot of experience working with rotors from my racing days in Colombia, where I designed rotors for a turbo class that required steel rotors. Over time, I’ve learned a few things about what works and what doesn’t.
Slotted vs. Drilled Rotors: I’m not a big fan of through drilled rotors (drilled across the whole braking surface). Sure, they’re lighter, and that helps reduce rotating mass—something you want to minimize because it’s the equivalent of horsepower in terms of acceleration and stopping power. But, drilled rotors can develop cracks around the holes, especially under heavy braking in track scenarios. Slotted rotors, on the other hand, are designed to release the gas that builds up at the pad-rotor interface during hard braking, providing more consistent braking without the risk of cracking.
Rotating Mass Matters: Reducing the rotating mass is key for both acceleration and braking. Every ounce counts when you’re trying to improve performance. But, I didn’t see a reason to go for larger rotors or calipers just yet. For autocross, big brakes are overkill. They add unnecessary weight and inertia, which can actually hurt performance in acceleration and stopping power during short, tight courses.
In the end, I chose a vented and drilled rotor set that’s the same size as the stock ones. Vented rotors allow for better cooling, which is especially important for track days, and the lighter design will provide just enough of an upgrade without being too extreme.
Pads: A Balance Between Daily Driving and Track Performance
The key to choosing brake pads for the SS Conegeek is finding the right balance between daily driving and track capability. Racing pads can handle extreme temperatures but tend to be noisy, dusty, and pretty ineffective when they’re cold—none of which are ideal for a daily driver.
EBC Yellowstuff Pads: After some research and reflecting on past experiences, I went with EBC Yellowstuff. I’ve used EBC pads on past cars, and they’ve never let me down. Yellowstuff pads, in particular, have a very broad temperature range, meaning they’ll perform well whether I’m cruising around town or heating them up on the track. Sure, they might be noisier and produce more dust, but I’m willing to live with that trade-off. The performance gain far outweighs the minor inconveniences. Also you get a 10% discount for EBC with your SCCA Membership which helps!

Brake Fluid: Don’t Neglect It
Brake fluid is one of those things that often gets overlooked, but it’s incredibly important, especially when you’re pushing the car hard. If the fluid gets too hot and boils, you’ll lose braking power—a situation I’ve had the misfortune of experiencing once before, and I’m not eager to repeat. My brake fluid was old and overdue for a change, so this was the perfect time to upgrade.
ATE Super200 Brake Fluid: Back in the day, I used ATE Superblue DOT 4 brake fluid, which I loved for its high boiling point and reliability. However, it’s no longer legal due to a regulation that brake fluid must be clear or amber in color. So, I’m using ATE Super200, which has the same performance but meets the legal requirements. It’s a little overkill for autocross, where you don’t see brake temperatures spike, but it’s going to be perfect for track days.
Affordable and DIY-Friendly
I performed the change in my driveway in about 4 hours. All I used were a set of jack stands, my jack, a ser of wrenches a ratchet set and a mini-mallet. For the fluid I used a one man bleed kit. Two tips, 1.) The caliper bolts in the Challenger get really tight, they use some threadlocker from the factory. And 2.) Make sure whetever single person bleed system you use has the right lid for your reservoir. The 43.5mm works for the challenger. Here are some photos from the install, also note my helper, he’s world class. The driveway was a little dirty with debris from hurricane Helene, but these are my priorities, challenger brakes before HOA. Obviously if you’re reading this blog, you’re in a similar mood. EBS has a street bedding procedure to avoid green fade, it consists on driving for a mile at 40mph while applying 30% brake at the same time to heat the brakes and evaporate the volatile constituents of the pad. Then you have to let the brakes cool while coasting. Let the brakes cool completely and repeat, ideally the next day. I did it three times, even though they suggest only two.


One of the great things about these brake upgrades is that even though they can be pricy, there’s a lot of safety not only on the track but on the road if your brakes are up to par. You can easily install them at home with simple tools. For a mix of daily driving and occasional track use, these modifications will last a long time and offer significant improvements in performance and confidence. I’m looking forward to testing out the new setup and seeing how it feels, especially when I push the car harder at the track.
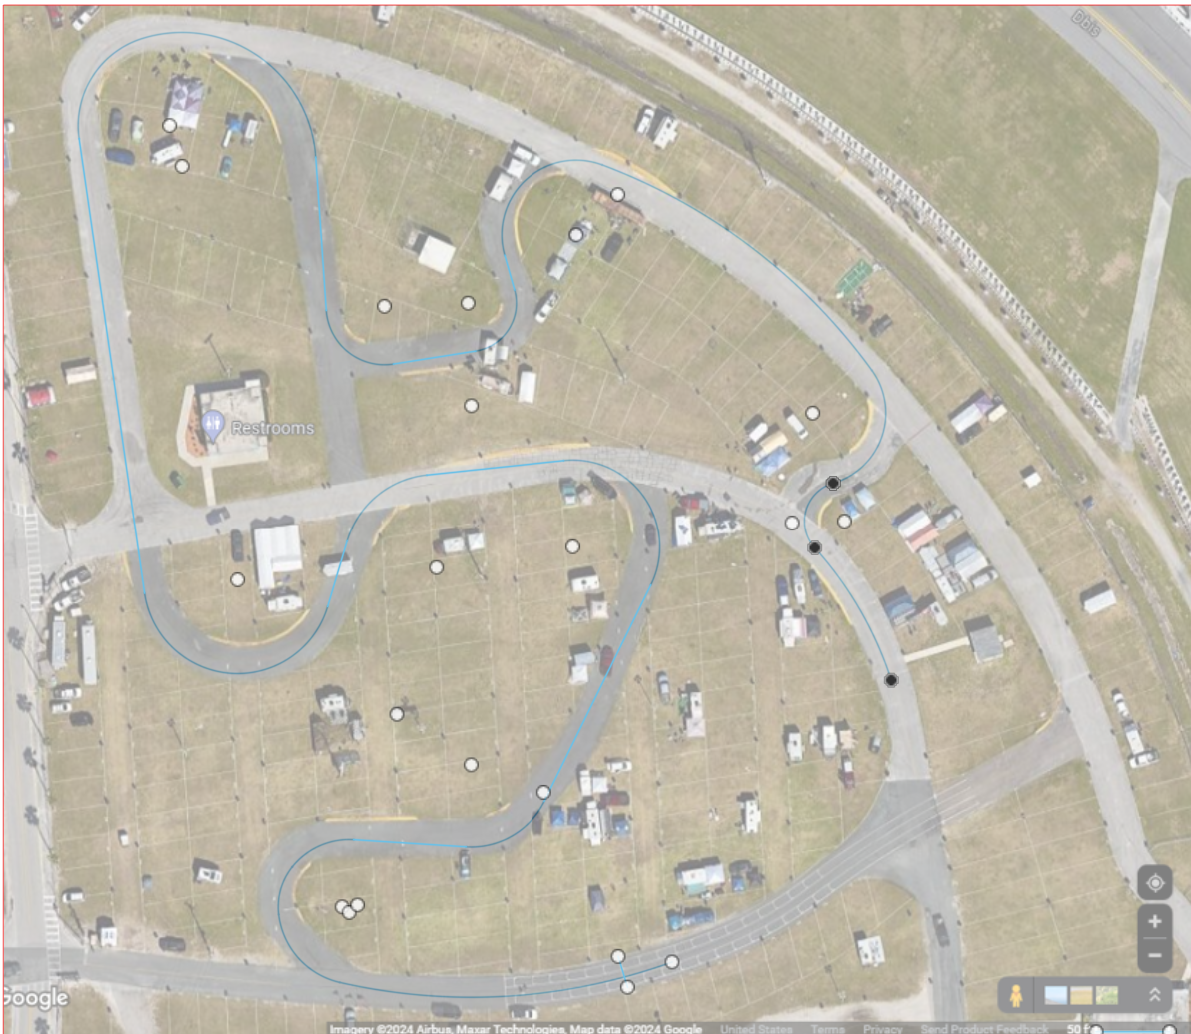
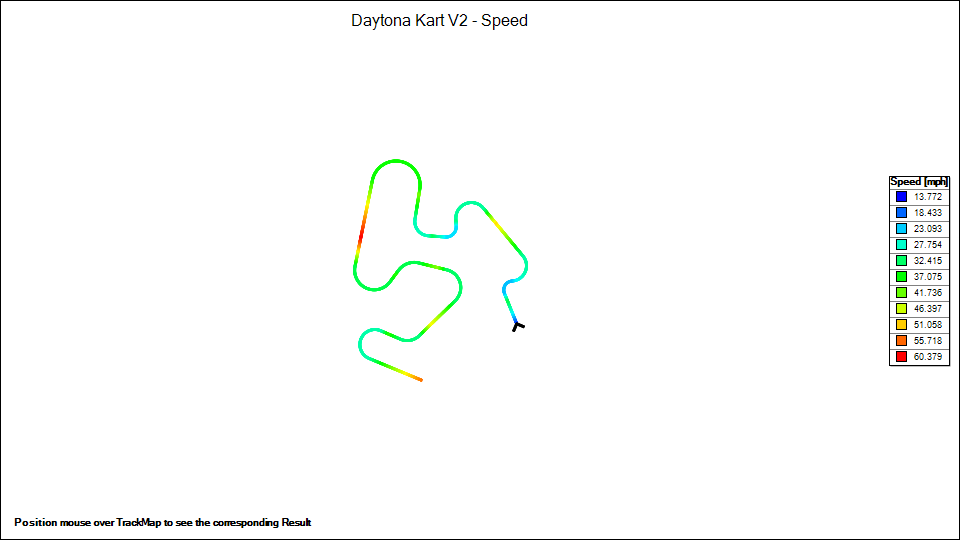
Now that I have the Apex pro, I took the car to an undisclosed location behind a strip mall close to my house and set up a fake track on the system so I could perform a couple of full emergency brakes from 40mph and gather braking data. Here is the trace before the install and after. Incredibly, the rotors were so shot the best I could get was a .63G stop. After the fix I could easy pull a 1.03G stop which matches what I expect my tires to be able of doing. Almost makes me feel ashamed I couldn’t feel the drop in performance on the track(parking lot) but luckily I had data to feel it for me.

Before the fix

After the fix
This upgrade is more than just fixing worn-out parts; it’s about taking the SS Conegeek to the next level of performance, and hopefully, I’ll feel the difference when I hit the track for that first time.

Comments
Post a Comment